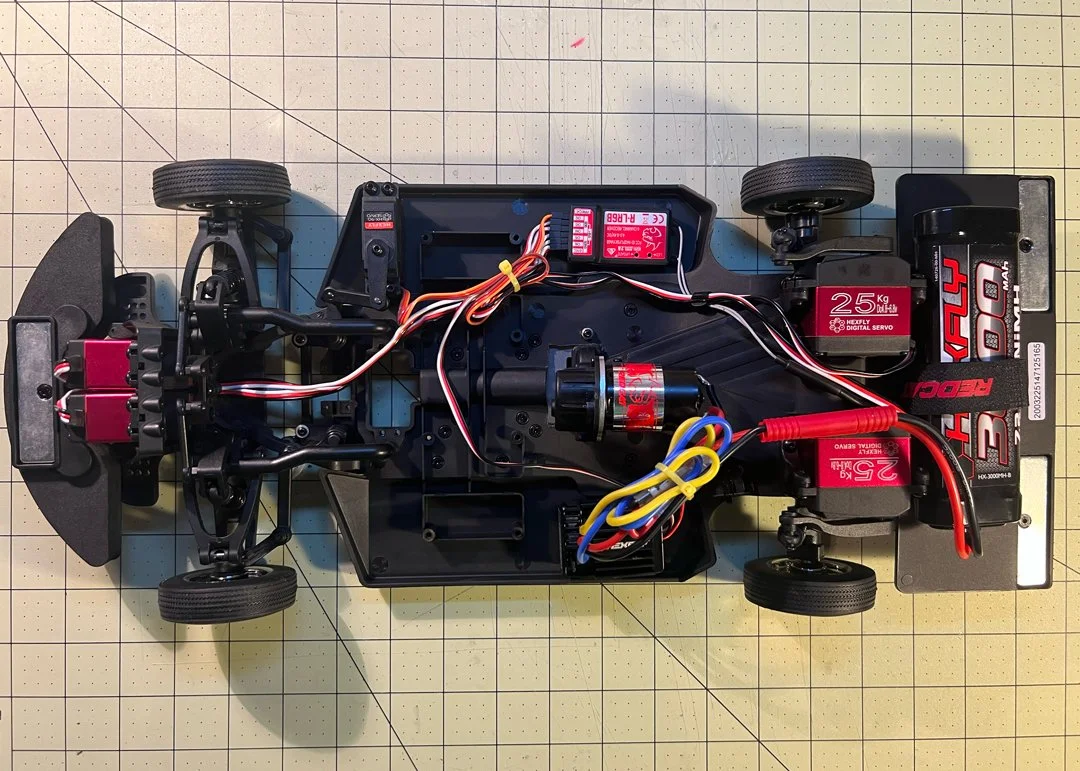
monte motor relocation plate

1. Remove Battery
(2 set screws, 1 on either end) may be tight fit.
4. Remove Motor and transmission case combo
(4 screws at base of case).

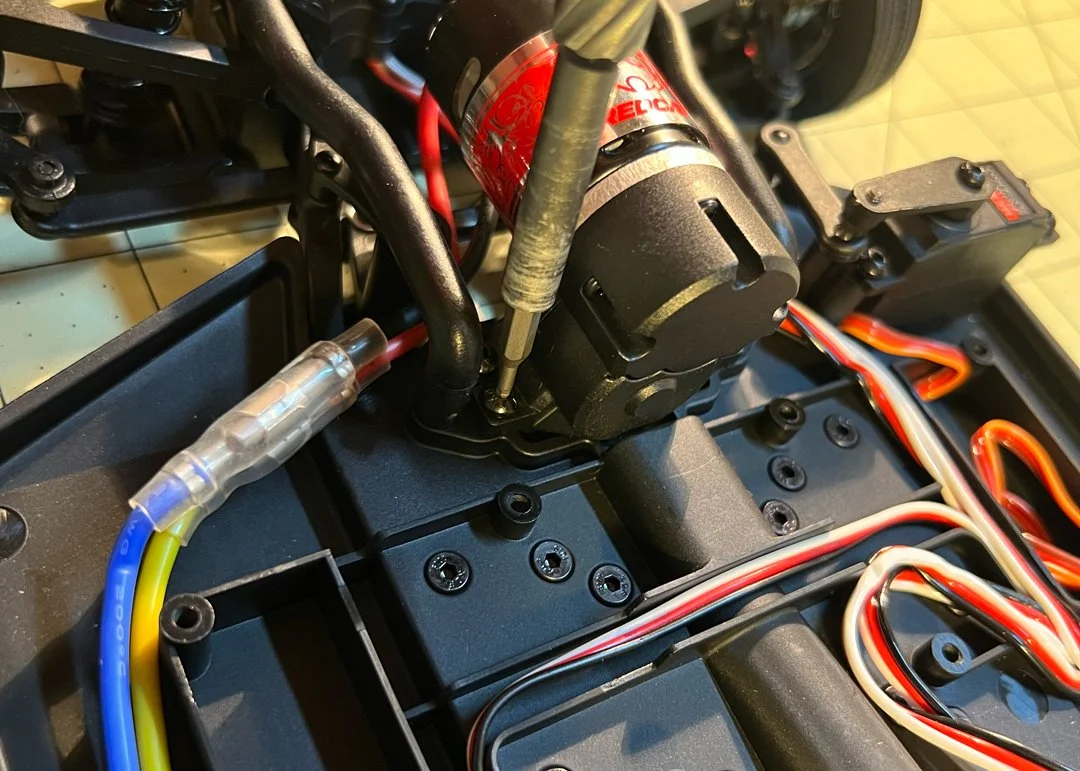
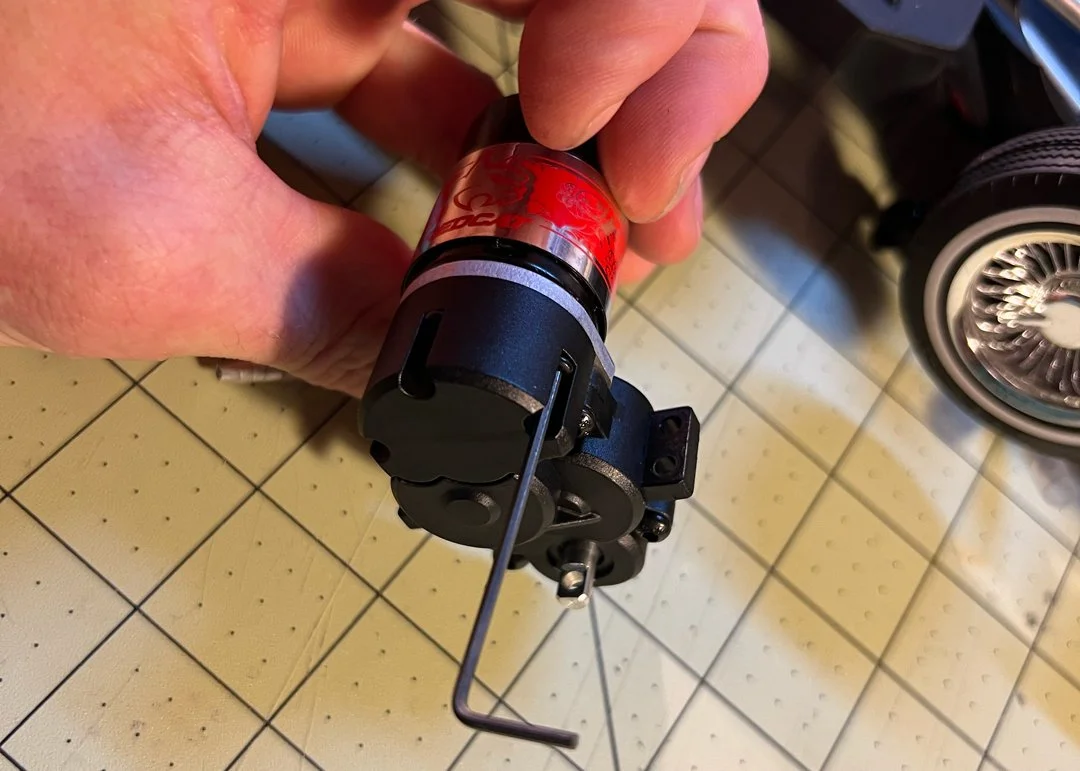
7. Install motor to “SixtyFour” transmission with 2 screws
NOTE: there must be a slight amount of space in between the motor’s gear and the connecting transmission gear (about the thickness of a piece of paper)
10. Pull out front driver side servo plug
Pull out front driver side servo plug from receiver (channel 3).
13. Pull out front driver side servo plug
Pull out front driver side servo plug from receiver (channel 3).
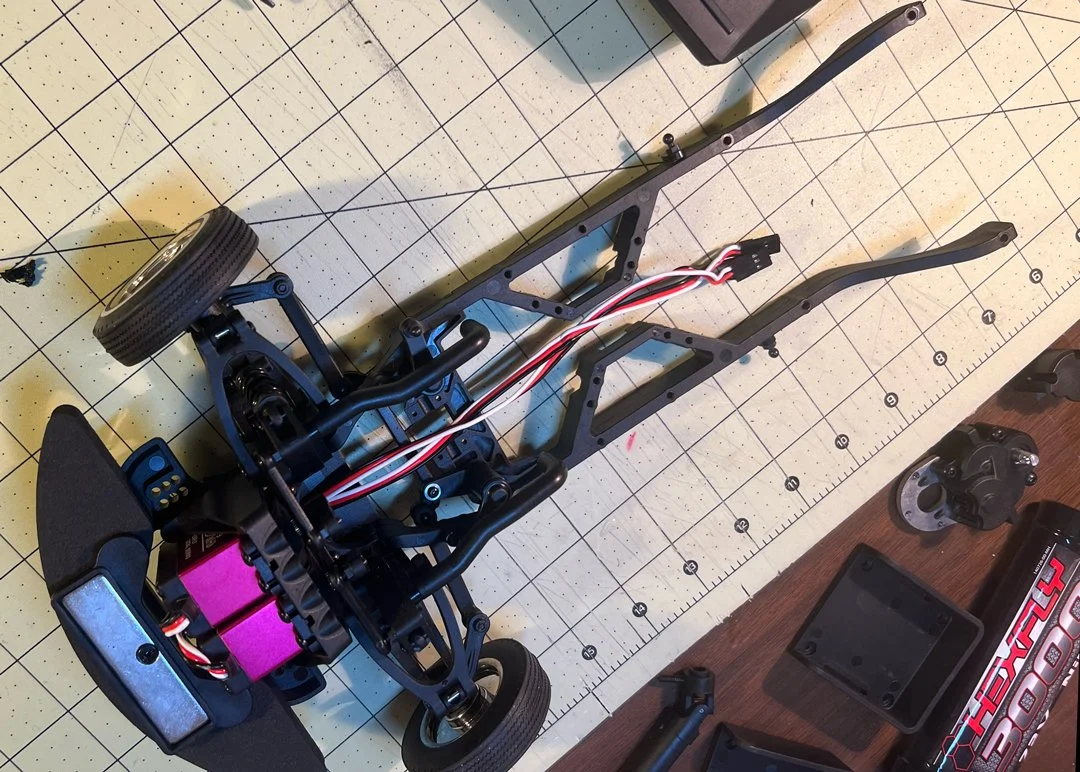
16. Pull front suspension, servos and frame rails away from the main chassis.

19. Screw motor mount plate
Screw motor mount plate into previous 2 holes drilled and screw a nut on each screw from the top of the chassis.
22. Reconnect front passenger side servo plug
Reconnect front passenger side servo plug to receiver (channel 4).
25. Reconnect lower trailing arms
Reconnect lower trailing arms to the ball-stud on either frame rail.
28. Cut slot at the top of the trunk pan
Cut slot at the top of the trunk pan, put Velcro battery strap through slot and re connect trunk pan with 2 screws.

2. Remove Battery Mounts
(4 screws per mount) and Velcro straps.

5. Pull apart motor wiring
(blue from red, yellow from black) this will be swapped when reinstalling.
8. Unscrew rear servos
(2 screws each servo) to reveal a single screw under each servo.
11. Pull out front passenger side servo plug
Pull out front passenger side servo plug from receiver (channel 4).
14. Unscrew front support bars from underside of the chassis
(2 screws) somewhat hidden under the breast plate but still accessible.
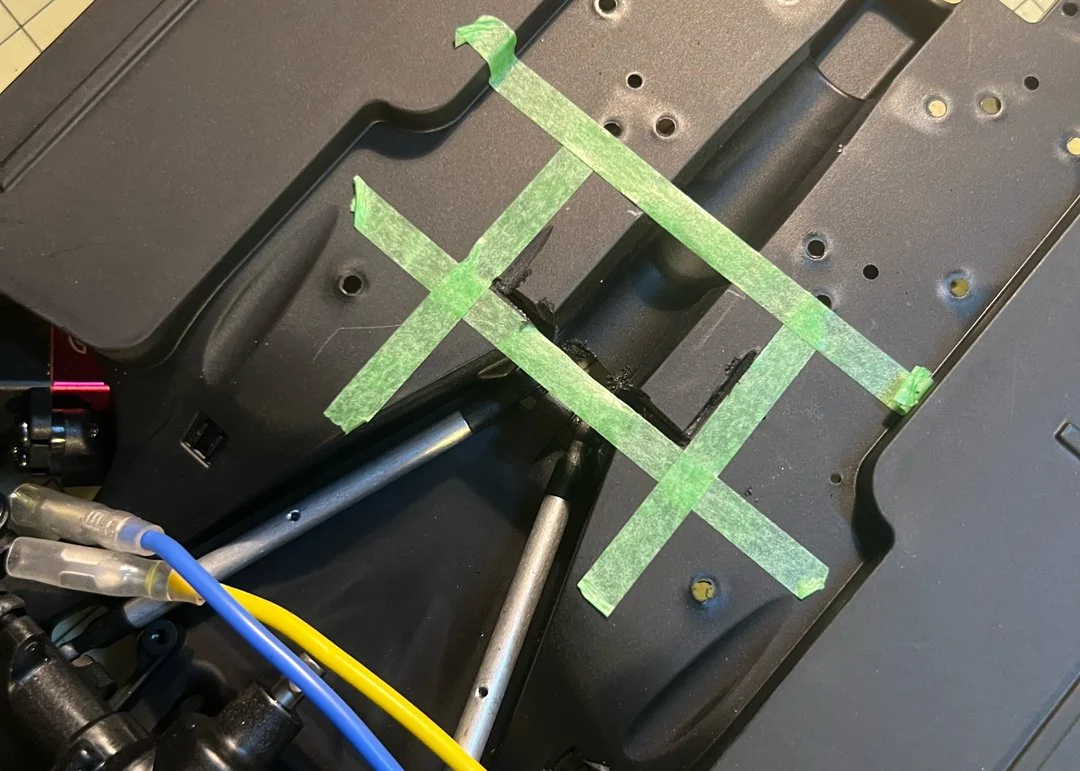
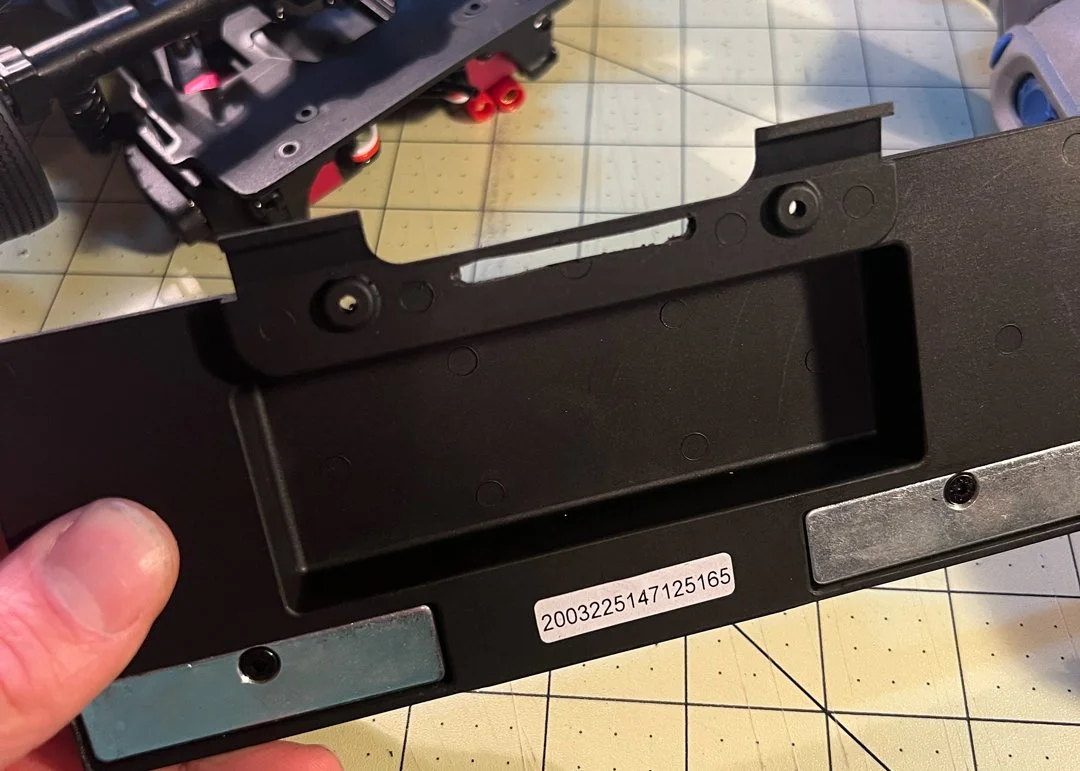
17. Mark off cut area with masking tape
(W – 37.5mm x H – 23.75mm) shown in picture.
Cut as much as possible from the bottom and complete cut from the top of the chassis.
Make sure transmission case’s mounting can pass freely through the hole you just cut.
File hole’s edges clean.

20. Connect motor wiring
Connect motor wiring, this will be swapped - blue to black, yellow to red.
23. Reconnect steering link to steering servo arm’s ball-stud.
26. Pull out front passenger side servo plug
Pull out front passenger side servo plug from receiver (channel 4).
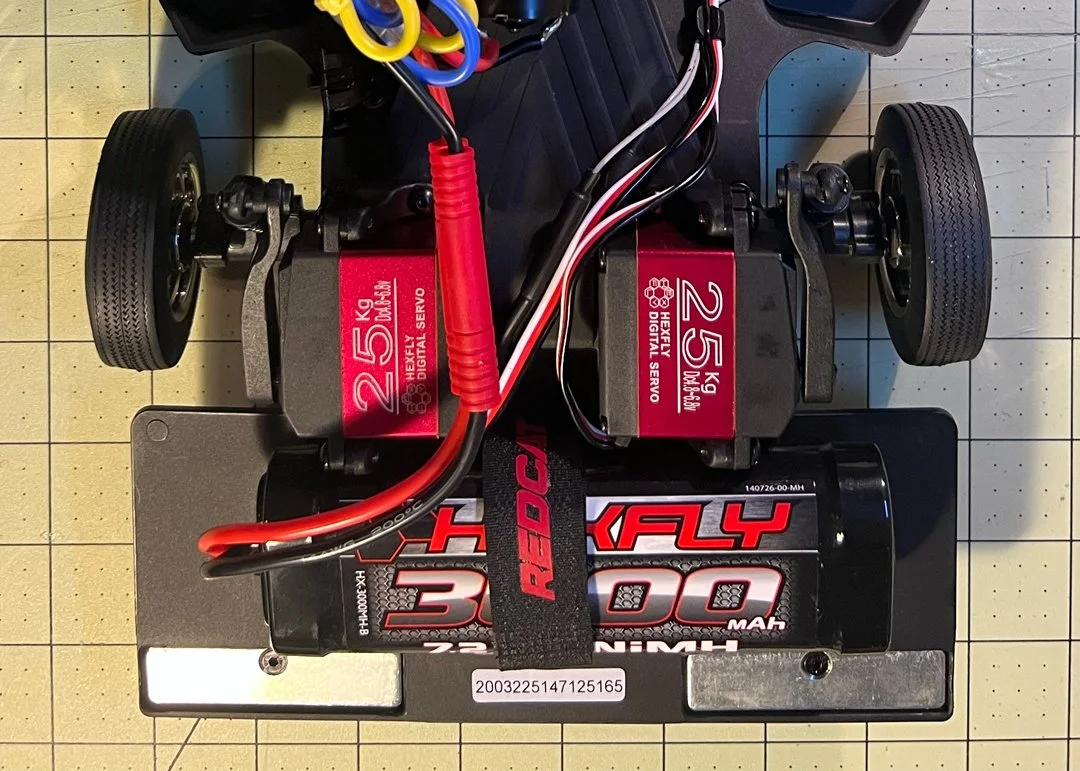
29. Strap battery into the new location in rear.
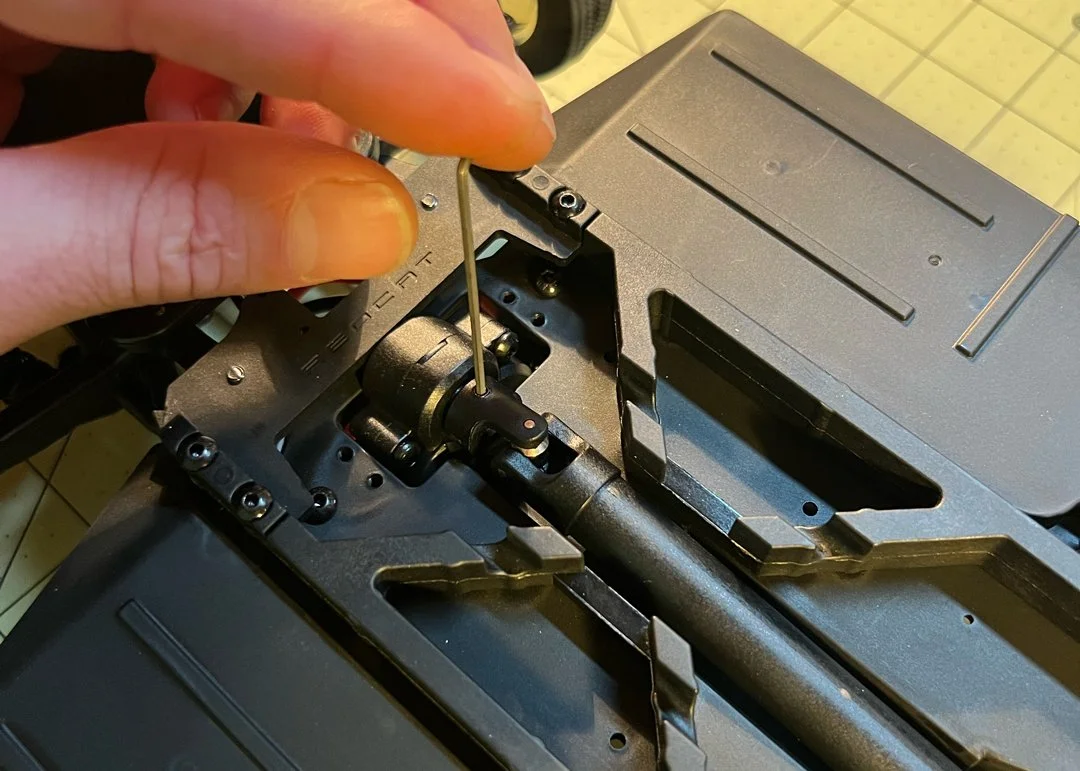
3. Remove Driveshaft
(2 set screws, 1 on either end) may be tight fit.
6. Remove top of the transmission case
(3 screws) to reveal 2 screws holding motor to case and remove these 2 screws to release motor.
9. Unscrew all 8 countersunk screws from top of chassis deck to release frame rails.
12. Release steering link from steering servo’s ball-stud.
15. Release 2 lower trailing arm links
Release 2 lower trailing arm links from ball-studs on either frame rails.

18. Put transmission case through hole
Put transmission case through hole and screw motor mount plate with 4 screws from the bottom of the chassis. Note: for a better angle in higher lockup use washers in between the plate and transmission case on the front two mounting screws
21. Reconnect frame rails with 8 counter sink screws.
Reconnect front driver side servo plug to receiver (channel 3).

24. swap Upper and Lower trailing arm links
Reconnect front passenger side servo plug to receiver (channel 4).
27. Remove trunk pan
Remove trunk pan with 2 screws on the underside of the chassis in the rear.